AFO 431 – Borrower maintenance
431.1 Introduction
Using AFO 431, you can maintain the administration of the borrowers of your library. The primary options of the borrower administration are the entry, modification and deletion of borrower records. Within the borrower administration, the membership fee is collected and a number of relevant options are given, such as registration of deposits and duplicate membership cards, printing borrower labels and viewing the loan history and status of a borrower.
These options often depend on the configuration of your system. Some parameters are also dependent on the settings chosen when setting up your system.
Please note!
On all options available in the borrower administration, a password security can be installed. As a result, selective access can be given to certain fields or activities. If you are not authorised for a certain activity, the system will display an error message.
In this Help file we assume you are authorised to perform all functions.
431.2 Add a new borrower
After choosing this option the following search form will be displayed:

Click on , After which the following form will be displayed:

Borrower’s barcode : Enter a unique number (barcode) here. A barcode can be scanned or typed in.
Note
If the number is already in use, the system will display an error message. You will have to assign a different number.
: Choose this option to have the system assign a (barcode) number for the borrower.
Note
When you have multiple custom barcode formats, it is not possible to have the system automatically generate a new number.
In both cases the following entry form will be displayed:

Note
·
Which fields are displayed here depends on the parameter settings in AFO 482 – Circulation parameters : Borrowers – Data to be entered. The system supports more than 250 data elements, divided into 24 groups (like Identity, Address, Preferences, etc). The order of these fields is also determined by parameters.
·
In some fields you can enter text, for others you must choose from a dropdown list.
·
Data already entered is determined by parameter settings in AFO 482 – Circulation parameters : Borrowers – Borrower Defaults and default settings in AFO 482 – Circulation parameters : Borrowers –Borrower Definition Settings.
·
The name of a borrower can consist of multiple subfields, but note that the old structure (i.e. one field for the name, containing both surname and first name) is still available.
|
Field |
Examples |
|
Title |
Mr, Miss, Mrs, Ms, Dr, Prof……. etc |
|
First name |
John |
|
Middle name |
Philip |
|
Prefix |
van der |
|
Last name |
Velden |
|
Suffix |
III, Jr, “of that ilk” |
·
Up to 10 addresses can be stored in each borrower record.
·
For each address multiple phone numbers can be stored. Each address can also have its own email address.
·
Addresses can be time dependent. This allows e.g. that notices are sent to a different address during vacation time.
·
Address fields are now capable of storing up to (at least) 5 lines of free form address, as well as Town/City, State/County, Country and Postcode/zipcode
·
Borrower records can be linked, so that a guarantor’s identity can be stored in a borrower record. The guarantor’s address can then be used to send (e.g.) overdue notices, bills, etc. Typical examples of guarantors are: parents (children), tutors (students), commanding officers (soldiers), etc.
·
All kinds of preferences can now be stored in the borrower record. These include, but are not restricted to, religion, profession, reading preferences, ethnic origin, and others..
· Up to 20 additional fields can be added to a borrower record.
The following fields are mandatory, irrespective of library defined parameters:
·
barcode
·
institution
·
location
·
name
If required the library can also designate other fields as being mandatory. When a mandatory field has not been entered, a warning is displayed:

After entering the required data and clicking , the overview screen with details of the new borrower will be displayed. If a registration fee is required, this will be shown immediately as an outstanding debt.
Note
When your library has eID (Electronic Identification) enabled it is NOT possible to use the automatic postcode feature. This should not be a problem however, as the correct postcode is contained in the eID. See the separate documentation on eID (in the General section) for more information.
See the next sections for a description of fields and options on the overview screen.
431.3 Identifying a borrower
Borrowers can be identified by a system number which is the original number. This is added to the borrower record if you add a new borrower with the Automatic barcode facility. Infor recommends that you use only valid borrower card barcodes when you add new borrowers. This will be the original barcode. If you have to replace the borrower card then the new barcode will become the current barcode.
The system will recognise the original number, the original barcode and the current barcode.
When you search for a borrower you can always search by borrower barcode, or by borrower name. If you select a borrower by name, a list with borrowers will almost always be displayed. Select a borrower from this list. The Identify a borrower window is displayed for a Simple search in a number of Circulation AFO's:
When you click on , a detailed search screen is shown. Which indexes are offered here depends on parameter settings in AFO 481 -–General – Miscellaneous – Circulation workflow – Borrowers.

Enter the desired search string and click . Separate each component by a vertical bar (Example: Bristol|Niblett). You must enter the first element in full but the second element can be a partial entry.
The overview screen with details of the borrower is shown. See the next sections for a description of fields and options on the overview screen.
Note
When your library has eID (Electronic Identification) enabled it is also possible to identify a borrower by scanning their eID card. See the separate documentation on eID (in the General section) for more information.
431.4 Borrower overview screen
Depending on parameter settings in AFO 482 various groups and elements will be offered on this screen. Generally it looks similar to this:
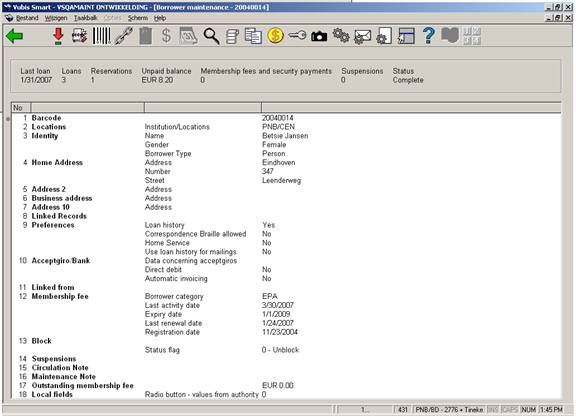
The system supports more than 250 data elements, divided into 24 groups (like Identity, Address, Preferences, etc). What is displayed is defined in AFO 482 – Circulation parameters : Borrowers – Borrower Definition Settings. Which fields are displayed when modifying any of these groups/elements depends on the parameter settings in AFO 482 – Circulation parameters : Borrowers – Data to be modified.
431.4.1 Modifying general data
Double click on a group to modify the subfields of that group. When you have done so, an input form is displayed.
For example:
Locations

or
Address 2

431.4.2 Replace barcode
When choosing the barcode field, the following input form is displayed:
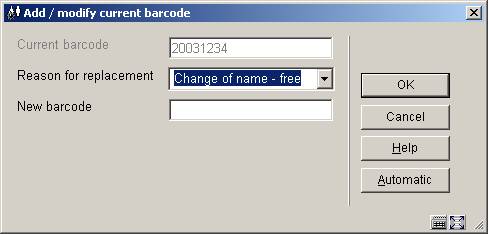
Fields on the screen
Current barcode: data in this field is for display purposes only.
Reason for replacement: Choose a reason for replacement from the dropdown list. There may or may not be a charge associated with the reason. This depends on settings in
AFO 482 – Borrower Authority Lists – Borrower barcode reasons for replacement.
New barcode: Either scan a new barcode or click on (see explanation in section 431.2).
The user can do two things:
·
Only fill in a "Reason for replacement".
· Fill in both "Reason for replacement" and "New barcode".
The replacement reasons are defined in AFO 482 - Borrower Authority Lists - "Borrower barcode replacement reasons". Vubis Smart as per default comes with 3 replacement reasons.
Case 1: Only fill in a "Reason for replacement"
This can happen for example when the borrower card is reported lost.
This creates the same kind of behaviour as case 2 below. It behaves as a block in AFO 411, 413 etc. (see below). The main difference is that as long as the barcode is not replaced you can undo the "Reason for replacement" by choosing the last option in Reason for replacement.
Case 2: Actually replace the barcode
A replacement reason is mandatory.
Case 3: Copy Borrower
AFO 431/Button Copy uses the same form as Barcode replacement, but the Replacement Reason line is not shown
In AFO 481 / Miscellaneous - Circulation workflow - Borrowers, there are a related parameters "Do not permit re-use of replaced barcodes" and "Do not permit re-use of removed barcodes".
There are 3 possible messages when you type in a barcode that was replaced. These messages can appear in the following AFO's: AFO 411, AFO 413,
AFO 414, AFO 415, AFO 416, AFO 417, AFO 418 (Per borrower view), AFO 419, AFO 421, AFO 431 and AFO 433.
(a)
Replacement reason is filled but barcode not yet replaced
(b)
The barcode has been replaced
(c) The borrower record was removed.
(c.1) Option "Do not permit re-use of removed barcodes" is ON. will result in a different message then when this parameter is OFF. If re-use is permitted, the following sceanario’s are possible after the warning message appears when entering a new borrower:
·
button is used: Return to barcode entry form.
·
button is used & name matches: continue entering new borrower, remove entry from archive file.
· button is used & name does not match: an error message is displayed, the user is returned to the entry form
Is a message an error message or a warning?
When you are in AFO 431 and you search for an existing borrower and a valid borrower record can be found, the messages are shown as a warning and the system continues with the display of the borrower record.
In all other cases (AFO 411 etc. or when you create a new record in AFO 431) this message is an error message.
Messages when searching on name and the borrower card being replaced
When you search a borrower by name and the card is in the process of being replaced (reported lost or stolen, for example), the message that the barcode is being replaced is shown as a warning message in AFO 431 or as an error message in the other AFO's.
Note
There is a non-interactive parameter. If set to 1, Barcode shows before Replacement code If set to 0, Replacement code shows before Barcode. The installation/upgrade procedure will turn this parameter on for each metainstitution as long as the following conditions are met:
·
If the default language for the system is Dutch at the time of the installation/upgrade, the barcode will display before the reason for replacement code field:

·
If the default language for the system is not Dutch, the reason for replacement code field is displayed prior to the New Barcode field (see screen shot at the beginning of this section).
Please contact Infor if you want to have this parameter changed from what it is for your default language.
431.4.3 Block
Double click on this line. The Block dialog box is displayed:

The Note
field is for entering free text.
The Registration date shows the date the block was applied.
·
Click one of the following:
-
Unblock to cancel a block or lost card
- Block to block the borrower from most circulation activities.
431.4.4 Suspensions
Borrowers can be suspended, or blacklisted, for more serious types of problem, such as owing large amounts of money. Borrowers can be suspended automatically depending on parameters set for overdue notices sent. You can suspend the borrower as part of AFO 495 Invoice control. You can also apply a manual suspension.
Double click on this group:

Enter a message in the field 'Suspension note' to place this borrower on the black list; remove the message as displayed to remove the borrower from the black list.
Notes
A borrower can also be automatically included in the black list. For example if the n-th reminder or the n-th accept giro is sent.
Once the invoice is paid, or any other reason for the suspension is cleared up, you can remove the suspension by double-clicking in the Suspensions group and deleting the text in the Suspension note text box.
The number of times the borrower has been suspended appears in the summary header of the Borrower maintenance screen.
431.4.5 Circulation note
Select this field to register a note or comment pertaining to this borrower. Information in this field is only displayed in AFO 431.
When you select this option, an input screen will be displayed. Enter a message in the field 'Message' to register a note for this borrower.:

431.4.6 Maintenance note
Select this field to register a note or comment pertaining to this borrower. Information in this field is displayed throughout the entire circulation module as soon as the borrower is identified.
When you select this option, an input screen will be displayed. Enter a message in the field 'Message' to register a variable message for this borrower:

431.5 Options on the borrower overview screen
Depending on parameter settings in AFO 481 not all buttons may be active. All options are described below.
![]()
: Select a line and then this option. This has the same effect as double clicking a line. See section 431.4.
: This option takes you to the deposits screen. See section 431.6.
: To add additional cards to the borrower record. See section 431.5.1.
: To specify relations with other borrower records in the database. See section 431.5.2.
: To delete the borrower record The system will ask for confirmation.
A borrower cannot be deleted from the file (the option will not be displayed) if:
·
the borrower still has items on loan;
·
reservations are registered in the borrower's name;
·
the borrower has not paid all amounts due;
·
the borrower is involved in the routing of an issue of a serial;
·
the borrower is involved in charging subscription fees for a serial;
·
the borrower is included as a requestor on an order in the Acquisitions module
In all of these cases, the option will not be active. See also below under for more information.
: Choose this option to pay membership fee. See section 431.5.3.
: You can renew a borrower’s membership, if the expiry date has passed. Parameters can be set to automatically renew membership under certain conditions, and for the default new expiry date.
: Choose this option for more details on outstanding loans, reservations, debts, etc. See section 431.7.
: If your system is configured you can print labels for borrower tickets. The system will switch to the standard output procedure.
: You can use the Copy function to copy a borrower record. This is useful if you have a borrower already registered and want to register members of the same family. The address fields will be the same, so copying the record saves time in data entry. Which fields are copied depends on parameter settings.
: Your system may be configured to allow a borrower to be charged a security payment, usually for the loan of equipment such as headphones for learning materials. The security payment is refunded when the item is returned. Choose this option to register a security payment. The following message is displayed:

The amount depends on parameter settings.
: Use this option to generate a PIN code for the borrower. If the borrower already has a pincode, the following screen is displayed:

: The system allows you to add one or more pictures to the borrower record. See section 431.5.4.
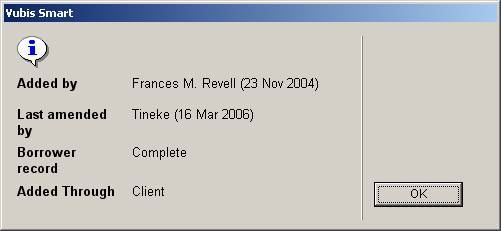
: Technical data shows you who added the borrower and when, and who last modified the record and when, and the record status:
After clicking another screen will be displayed, showing reason why this record cannot be deleted:

See also section 431.7 – Details screen for additional information.
: Use this option to set a specific contact method for the individual borrower. After choosing this option the following form will be displayed:
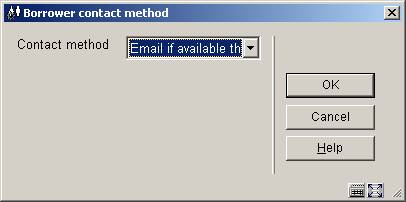
Choose a method from the dropdown list.
It is more usual however to define the contact method for a borrower according to the following hierarchy.
·
Borrower category
·
Loan location
·
Circulation meta institution
·
System as a whole
: The purpose of SDI (Selective Dissemination of Information) is to inform borrowers when items that may interest them become available in the library. There are several parameters that must be set up on the system to enable this functionality. Borrowers can set up their own SDI profiles in the WebOpac. See section 431.5.5.
: This allows you to specify a different Maximum number of loans for a particular borrower. If this is set, then it is used, instead of the MAX values from the borrower or item maximums.
431.5.1 Additional cards
You can issue additional cards so that a main card holder is responsible for all cards, but additional users can make use of the library facilities.
For example, you might have a department within your authority such as Social Services where the senior manager holds the main card and individual social workers have the additional cards. Items can be borrowed from the library for official business by anyone in the department, but the senior manager receives all overdue notices, invoices and other printed notices.
: To add additional cards to the borrower record. After choosing this option the following form will be displayed:
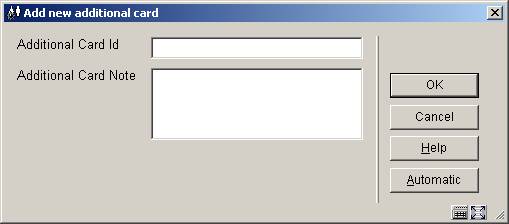
Enter a barcode or click on . The button assigns the next available barcode id. The note field has a maximum of 500 characters.
The costs for additional cards are the same as for duplicate cards. They will show in the reports as Duplicate Card.
After clicking there will be an extra screen in case there are costs.
The screen is then redisplayed with an additional option:

After clicking again, an overview screen will be shown:

Options on the screen
: Choose this option to add another card. The procedure is described above.
: Choose a card and then this option to Block / Unblock the additional card.
:Choose a card and then this option to delete the card.
Note
You can set the maximum number of cards allowed for each borrower category in AFO 482 Additional cards per borrower.
431.5.2 Links
Borrower records can be linked, so that a guarantor’s identity can be stored in a borrower record. The guarantor’s address can then be used to send (e.g.) overdue notices, bills, etc. Typical examples of guarantors are: parents (children), tutors (students), commanding officers (soldiers), etc
For each job, the library can select which address should be used in correspondence. Also, if guarantors are used, the library can decide to override the borrower’s address with that of the guarantor for specific jobs. For example, the library might choose to send the 3rd overdue notice to the guarantor’s address.
: To specify relations with other borrower records in the database. After choosing this option the following form will be displayed:
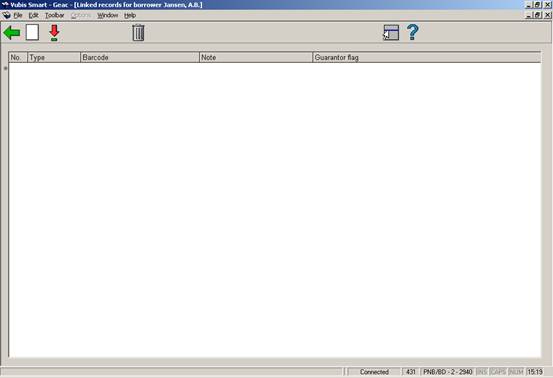
Options on the screen
: Choose this option to add another card. After choosing this option the following form will be displayed:
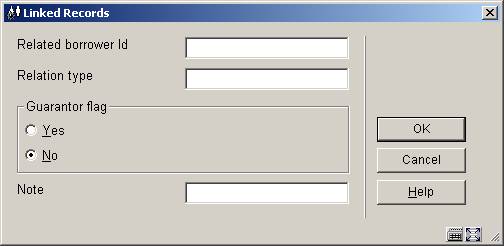
Fields on the screen
Related borrower ID: enter the barcode of the borrower with whom the relation must be established. The system does not generate a reciprocal relation.
Relation type: enter a valid relation type. These are defined in AFO 482 – Borrower Authority Lists.
Guarantor flag: specify whether or not the borrower is a guarantor for the related borrower.
: Select a linked card and choose this option to modify the note and/or change the guarantor flag.
:Select a linked card and choose this option to delete the linked record.
Let op
You can set the maximum number of cards allowed for each borrower category in AFO 481 – Miscellaneous – Circulation workflow - Borrowers.
431.5.3 Receive membership fee
: Choose this option to pay membership fee. In some cases an intermediate screen with an overview of payment calculation will be displayed.
Then the payment screen is displayed:

Fields on the screen
Expiry date: Expiry date of the membership, appears as system supplied information.
Pay: Amount owing, appears as system supplied information.
Receive payment: Select a method of payment from the Receive payment options and click :
·
Cash - the amount shown in the Pay field will show in Cash administration as having been received in cash;
· Waive - the amount shown in the Pay field will show in Cash administration as having been received in waived. If you waive an amount, you will also be asked to enter the password defined in Override password(s) in the Override password field.
Note
Locally defined payment methods -additional methods of payment can be defined in Define cash codes. If you select this method you will be presented with a further window in which you can enter a note of up to 25 characters. For example:

Optionally you can print a receipt for the amount paid. This takes you to the standard screen for output.
431.5.4 Photo
: The system allows you to add one or more pictures to the borrower record. If a borrower is selected that has a picture linked to that record, the picture is shown in a floating window in AFO 431 (Borrower administration).
After choosing this option an overview screen will be displayed:
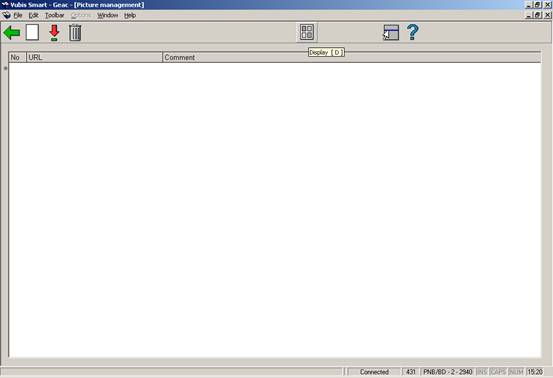
Options on the screen:
(+): Select a photo and choose this option to modify the details.
(+):Select a photo and choose this option to delete it.
: When this is activated the floating thumbnail preview will be updated if any changes where made.
: After choosing this option the following form will be displayed:

If you selected a borrower who has a picture linked to his borrower record, the system will automatically show the picture(s) when the main borrower screen in AFO 431 is accessed.
It is possible that multiple pictures are attached to an individual borrower record, as shown in the next screen example.
The picture can be shown in the original size by clicking on the picture or comment (if there is one present). The default internet browser is then started, and the picture is shown in its original size.

431.5.5 SDI
After choosing this option the following form will be displayed:
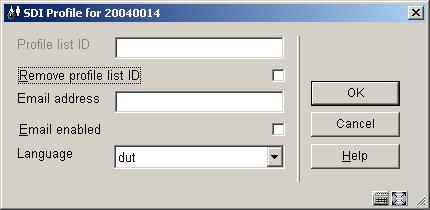
Fields on the screen
Profile List Id: This is the id of the profile list used by the borrower. This can not be edited here.
Remove profile List Id: If selected, then the borrower's profile list and all associated profiles, queries and results will be deleted when this dialog is closed.
Email address: This is the email address that SDI notification emails are to be sent to.
Email enabled: Email notification is enabled for this borrower.
Language: This is the language SDI notification emails are to be sent in.
In order to determine whether a user is allowed to use SDI, the following criteria are checked (in order):
·
User personally blocked or black list
·
Borrower category
·
Institution / location
·
Institution
· System wide
If the user passes all of those tests, then they are allowed to use SDI.
431.6 Deposits
In general, this functionality requires the library to define one of more types of deposits that may be used by borrowers of the library. Within a type of deposit, the library then defines which types of charges the deposit can pay for (i.e. only loan fees). Additional parameters can then be defined for each deposit type at the borrower category level for min/max levels for deposit amounts, etc. A borrower can then add money to his/her deposits. Payments which were traditionally done through an exchange of cash may then be replaced by paying outstanding amounts owing out of the money a borrower already has on deposit with the library.
This is dependant on parameter settings in
AFO 481 – Circulation parameters : General - Deposits.
If the library wants to allow it, the deposit can be negative (i.e. you can be in debt to the library, i.e. the deposit can turn from credit to debit, if the library-defined rules allow it).
After choosing this option and the borrower has a deposit, an overview screen will be displayed.
When you choose the “Modify deposit” icon, a screen displays containing a protected window containing the borrower’s name and address and a list (grid) of deposits that the borrower currently has including the deposit’s code, brief description and current amount.

Options on the screen
: Choose this option to add a new deposit. See section 417.6.1.
: This option is used to increase the amount of the deposit. You can only add money to deposits whose usage restrictions contain the current institution/location within their scope. For example, a borrower at PNB/BD can add money to his deposit that has usage restriction of PNB/* but cannot add money to his deposit that has usage restriction of TST/BR1. The borrower would have to physically go to TST/BR1 to add money to the second deposit.
If you are not allowed to add money to the deposit, the system displays a message.
:Use the delete icon to delete the selected deposit. A deposit can be deleted only if the deposit balance is 0 or less than zero.
: Choose this option to (partially) refund the deposit. See section 4.17.6.2.
431.6.1 New deposit
After choosing this option the following form will be displayed:
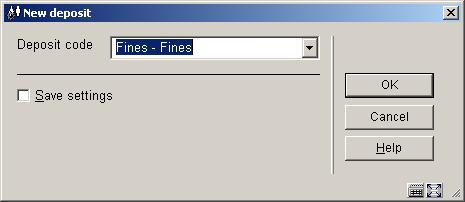
Choose a valid deposit type. These codes are defined in AFO 481 – Deposits – Deposit codes. Next, an input screen is displayed:

Fields on the screen
Deposit code, Description and Current amount on deposit are protected fields.
Amount to add: The amount to add field must be greater than the amount defined as the minimum amount of positive deposit change and must be greater than the minimum total amount of deposit (these amounts are defined in AFO 481 – Deposit codes).
Borrower who pays deposit: This field may be protected, may be limited to a list of related borrowers (with the specific relation type(s) defined in the deposit code record) or the borrower may be displayed along with a search button.
Payment code: Choose a payment code from the dropdown list. These codes are defined in AFO 481 – Deposits – Valid payment types.
431.6.2 Refund deposit
The ability to refund cash from deposit accounts is a restricted function. In AFO611 –Passwords – Login restrictions – Borrowers and Loans (continued), there is an option, Refund deposits, that restricts users from using the Refund option on the Modify deposits screen. If you attempt to refund and you are a restricted user, a warning message is shown.
If you are allowed to refund and the deposit is still valid for your borrower category and if, within the usage restriction scope of the deposit, there is at least one institution/location set-up for your borrower category that is in-use and the usage restrictions contain the current institution/location, a form displays containing the following fields:

Fields on the screen
Deposit code, Description and Current amount on deposit are protected fields.
Administrative costs: protected. Defaults to the amount defined in the Deposit code record. It is never more than "Current amount on deposit".
Amount to refund: free text. Automatically defaults to the (current amount – administrative charge). This is the maximum amount that the borrower can get back. If the Allow partial refunds flag is not set in the Deposit code, this is the only acceptable amount for the borrower to get back.
Note
If the deposit is no longer defined or is not in-use for the borrower category, all of the money is refunded back to the borrower. The deposit is removed from the borrower’s list of deposits.
Note
You are only able to refund money from deposits whose usage restrictions contain the current institution/location within their scope. For example, a borrower at PNB/BD can get money refunded from his deposit that has usage restriction of PNB/* but cannot refund money from his deposit that has usage restriction of TST/BR1. The borrower has to physically go to TST/BR1 to refund money out of the second deposit.
431.7 Details screen
: Choose this option for more details on outstanding loans, reservations, debts, etc.
After choosing this option an overview screen will be displayed:
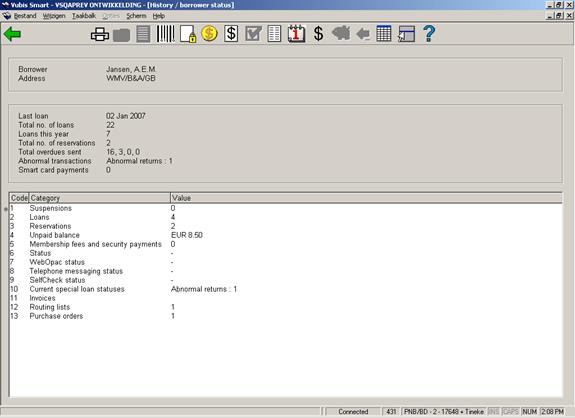
You can double click on the lines in the bottom half of the screen to call up the underlying information. This roughly corresponds to the buttons on the toolbar at the top of the screen.
For example, click on Suspensions:
For Current loan statuses and Invoices see 431.7.1.
Options on the screen
: This takes you to the standard form for output.
: When you choose this option a window will pop up displaying the previous barcodes plus reasons for replacement (only available if a barcode has been replaced at least once).
: Only active if the borrower is suspended.
: this option takes you to the standard renewal screen as in AFO 413. See the Help for that AFO for more information on. From this screen you can also add or change the loan status of items on loan to this borrower. See also the Help for AFO 423 for more information on loan status changes.
: this option takes you to the reservations overview screen as in
AFO 415. See the Help for that AFO for more information.
: this option takes you to the accept payments screen as in AFO 414. See the Help for that AFO for more information.
: this option takes you to an overview of payments made for membership and security deposits:
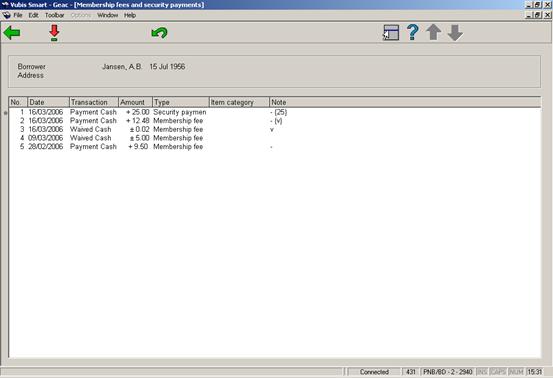
If you have permission, you can refund amounts here.
: Only active if the borrower has one or more blocks.
: when you choose this option a pop-up screen with items currently on loan is displayed:

You can double click on a line for more information on a particular transaction.
: this option takes you to an overview of payments from and into the borrowers deposit account:

From this screen you can print a summary or a detailed report. The summary shows one line per transaction and is the same as on screen. The detailed report also shows additional information, such as session ID, cash register, name staff. Each line consists of: line number, date/time, transaction, amount, type, notes, session ID, cash register, name staff and balance.
: this option takes you to an overview of payments:

You can double click on a line for more information on a particular transaction.
From here you can continue to the overview of payments made for membership and security deposits.
: this option goes with the Loan Plan functionality. See section 431.7.3 for more information.
: this option goes with the Loan Plan functionality. See section 431.7.3 for more information.
: this option takes you to an overview of all transactions.
431.7.1 Other lines
The last section of lines on the details screen relate to information in various other modules of the system. Lines 10 and 11 on the borrower Details screen are more or less related.
It is possible to assign special statuses to items on loan to a borrower (see the Help on AFO’s 413 and 481 for more information). See sections 431.7.1.1 en 431.7.1.2.
Line 12 provides information on routing lists within the serials module. See section 431.7.1.3.
Line 13 provides information on orders within the Acquisitions module. See section 431.7.1.4.
431.7.1.1 Current loan statuses
The figures in the window border show the totals of each type of loan status ever applied. Line 10 in the screen displays show the numbers of these considered to be “current” as defined by the settings for each type.
Selection of line 10 allows you to display a summary of all such transactions. After choosing line 10 an overview screen with loan status transactions is displayed:

The loan status summary display shows a grid with one line per transaction, in a manner very similar to the display of loans. The grid layout comprises a header portion with brief borrower details (in standard form) followed by a grid. Transactions will be shown in reverse date order i.e. most recent first.
This displays only the current setting (or if no current loan status) shows the previously saved status. (Thus for example it is possible to see that an item was returned from missing). An additional option on this grid listing allows ALL historic loan status transactions to be displayed, if they were set to be “retained”.
Options on the screen
: select a transaction and then this option to display the details of the selected line.

: select a transaction and then this option to delete the selected line.
: to display all historic status changes. Items which have had a loan status set will have some of the details of the original loans together with relevant details of the loan status. When a loan status code changes, then we keep a history of these changes i.e. to track the change of claimed returned, to lost.(for example). This history will be displayed as well. Information retained and therefore displayed includes:
·
Date / time set
·
User who added this status setting
·
Date / time (amended)
·
User who amended this status setting.
·
User date (textual form).
·
Invoice number
·
Borrower number and summary(when associated with a loan transaction)
·
Overdue fine calculated
·
Original loan date
· Original due date
: select a transaction and then this option to modify the details of the selected line.

: select a transaction and then this option to go to the invoice details screen for the selected line (when appropriate). This takes the user to the invoice display (if they have permissions for AFO495).
431.7.1.2 Invoices
Line 11 allows you to display a summary of invoices associated with this borrower. (Effectively this behaves as if you had used AFO495/View invoices by borrower- although line 11 is always shown, selection of this line does nothing unless you have privileges to AFO495).
It is possible to view/create invoices from line 11 in the Details display. When you choose this option in case no invoices have been created as yet, the system asks if you want to do so:
After clicking you will be taken to the AFO 495 screen (if you have permission) where a provisionary invoice has already been created.
If the borrower already has one or more invoices you will be taken to the AFO 495 screen, option View/create invoices by borrower (if you have permission).
431.7.1.3 Routing lists
It is possible to link borrower records to routing lists belonging to subscriptions within the serials module. You can view which lists the borrower is linked to by choosing line 12 from the Details screen. An overview will be presented:

By selecting a title from the list the individual details of a particular routing list can be viewed and modified.
431.7.1.4 Orders
It is possible to link borrowers as requestor to an order record within the acquisitions module. You can view which orders this borrower has requested by choosing line 13 from the Details screen. An overview will be presented:

By selecting a title from the list the individual details of a particular order can be viewed and modified.
431.7.2 Transactions
: this option takes you to an overview of all transactions.
Transaction history allows you to view all the transactions that have involved the borrower in the Vubis Smart Circulation module. So it shows transactions such as Loans, Returns and Renewals but also includes other transactions such as an update made to the borrower record, technical transactions and transactions that are created by overnight batch processing.
The information that is displayed is updated automatically and online, i.e. every time a borrower is involved in a circulation transaction.
Some of the information is also contained in the Payment History information.
The period during which the information is available is usually the current year and the previous year, but this might differ from system to system.
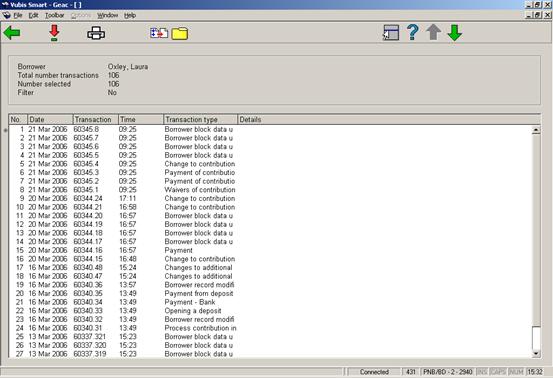
For each transaction the system displays the date, the time, the transaction number and the transaction type. The Details column is reserved for future use.
Note
Each line represents a transaction as defined in the Vubis Smart circulation context. For example if 6 items are lent to a borrower during the same Loans session, Vubis Smart counts this as one transaction, represented by one line on the screen.
Options on the screen
– The system displays a pop-up window that shows the transaction details. See section 431.7.2.1.
– The output option is used to send the transactions to a valid device or application. The Standard output form is displayed.
– The filter option is used to restrict the transactions that are displayed. See section 431.7.2.2.
– The savelist option is used to store the transactions in an existing or a new savelist of the type Circulation transactions. After the transactions have been stored in the savelist, they are available for further SSP actions in AFO 141 Savelist management..
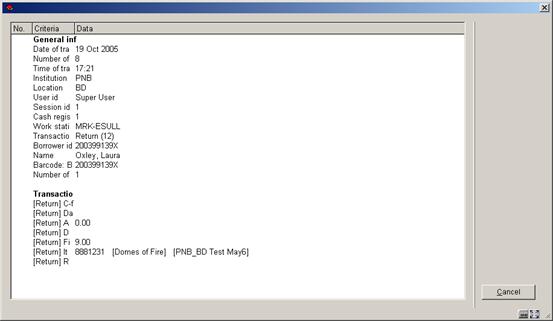
431.7.2.1 Transactions (details)
The system displays a pop-up window that shows the transaction details. This shows the date and time of the transaction, information on where the transaction took place, the staff user id, the borrower barcode and name, and the number of actions.
The example below shows one return transaction (1 item returned):
General information
|
Label |
Data |
Comments |
|
Transaction date |
Date on which the transaction occurred |
|
|
Number of transaction |
The number of the transaction within the Date |
The combination of Date and Number make each transaction unique |
|
Transaction time |
Time at which the transaction occurred |
|
|
Institution |
Institution where the transaction occurred |
|
|
Location |
Location where the transaction occurred |
|
|
User id |
Staff user that performed the transaction |
The User id is WebOpac if the transaction was done by the borrower through the WebOpac |
|
Session id |
Cash management session id |
|
|
Cash register |
Cash register that was linked to the session |
|
|
Work station |
Work station id |
This is the logical work station id, which can have many formats (e.g. ip address) |
|
Transaction type |
Transaction id type |
This is a number that identifies the transaction (see below for the list of valid transaction types) |
|
Borrower id |
Id of the borrower (original barcode) |
|
|
Name |
Borrower name |
|
|
Barcode |
Actual barcode of the borrower |
|
|
Number of actions |
Number of actions in the transaction |
In case of Loans this is the number of items that were lent, in case of Returns the number of items that were returned, in case of Payments the number of debts that were paid, etc. |
Transaction types
The following transaction types are valid:
|
Transaction id |
Transaction wording |
|
11 |
Loan |
|
12 |
Return |
|
13 |
Renewal |
|
15 |
Payment |
|
16 |
Reservation (new) |
|
17 |
Refunds / miscellaneous payments |
|
18 |
Deposit refund |
|
19 |
Payment from deposit |
|
21 |
Reservation modification (new expiry date) |
|
22 |
Reservation (change priorities) |
|
27 |
Reservation trapped through picklist/reservation messaging |
|
27.02 |
Reservation trap period storage |
|
27.1 |
Reservation (return via request module) |
|
29 |
Loan status amendment |
|
30.1 |
Borrower record modified (new or modified) |
|
30.10 |
Storage of postage costs in borrower record |
|
30.11 |
Change to 'summary info' in borrower record |
|
30.12 |
Payment of contribution; update borrower record |
|
30.13 |
Create an 'open' contribution fee |
|
30.14 |
Create deposit info in borrower record |
|
30.15 |
Circulation note deleted |
|
30.16 |
Process contribution in borrower record |
|
30.17 |
Storage of dates related to (automatic) invoicing |
|
30.18 |
Put borrower on suspension |
|
30.19 |
Update contribution data following automatic renewal of card validity |
|
30.2 |
Update claim history of borrower |
|
30.20 |
Modification of loan parameters in borrower record |
|
30.21 |
Adjust expiry date (and pay full membership if applicable) |
|
30.22 |
Adjust expiry date and recalculate membership |
|
30.23 |
Borrower block data updated |
|
30.231 |
Borrower block data updated (WebOpac) |
|
30.232 |
Borrower block data updated (Telephone messaging) |
|
30.233 |
Borrower block data updated (Self Check) |
|
30.24 |
Increase number of renewals during loan |
|
30.25 |
Change to the individual maximum of loans |
|
30.26 |
Add card id |
|
30.27 |
Delete card id |
|
30.28 |
Update PIN code |
|
30.29 |
Update photo |
|
30.3 |
Registration of 'abnormally returned items' |
|
30.30 |
Update index following delete of borrower record |
|
30.31 |
Update index following import of borrower record |
|
30.32 |
Opening a deposit |
|
30.33 |
Changes to additional borrower cards |
|
30.34 |
Removal of a deposit |
|
30.4 |
Payment of contribution |
|
30.5 |
Remove deposit info from borrower record |
|
30.58 |
Circulation note added/modified |
|
30.59 |
PIN code (re)generated |
|
30.6 |
Change to contribution data (in borrower record) |
|
30.7 |
Change to suspension history |
|
30.8 |
Removal of actual barcode |
|
30.81 |
Borrower card replacement reason (Card not yet replaced) |
|
30.811 |
Undo borrower card replacement reason |
|
30.9 |
Delete borrower record |
|
30.10 |
Storage of post costs in borrower record |
|
30.20 |
Modification of loan parameters in borrower record |
|
30.30 |
Update index following delete of borrower record |
|
31 |
Payment of contribution (coincides with type 33) |
|
32 |
Delete borrower |
|
33 |
Payment of contribution |
|
35 |
Credit card pay accepted |
|
36 |
Credit card pay submitted |
|
37 |
Credit card payment |
|
38 |
CardHolder payment failed |
|
39 |
Credit card pay failed |
|
40 |
Add renewal administration fee |
|
41 |
Collection fee |
|
51 |
e-Loan |
|
60.1 |
Action related to cash register |
|
85 |
Payment waived |
|
86 |
Waivers of contribution |
|
88 |
Create open deposit |
|
89 |
Remission from deposit |
|
90 |
Enrolment fees |
|
91 |
Payback (deposit, contribution, 'free') |
|
95 |
'Book fee' |
|
96 |
Administrative fees |
|
97 |
Costs for new card |
|
99 |
Sales (no payment) |
|
115 |
Payment – Bank |
|
133 |
Payment of contribution - Bank transfer |
|
215 |
Payment – Acceptgiro |
|
233 |
Payment of contribution - Accept giro |
|
315 |
Payment – Card |
|
333 |
Payment of contribution - Card |
|
415 |
Payment – Account |
|
433 |
Payment of contribution – Account |
|
515 |
Payment – Pin |
|
533 |
Payment of contribution - Pin |
|
615 |
Payment – Chip |
|
633 |
Payment of contribution - Chip |
Action specific information
For each action information is given dependent on the type of transaction For example for each item lent the system shows the time, item barcode, any loan fee and whether there is a reservation for the item. The following table contains an overview of the valid transaction types.
431.7.2.2 Transactions (filter)
After choosing this option the following form will be displayed:

The following options are available:
·
From date select a date from the drop-down box. Note that the display includes the date selected.
·
Until date select a date from the drop-down box. Note that the display includes the date selected.
·
Transaction type select one or more transaction types from the left side and use the arrow to move to the right side.
·
Institution/location select one or more locations from the left side and use the arrow to move to the right side.
Note
You can select more than one filter at the same time. The filter is retained for your user login until you change the filter. Use the button to remove all the filters.
431.7.3 Loan Plan
See also the general information on Loan Plan.
There are two options on the details screen of a borrower related to Loan Plan: and
These options are only active when:
·
Loan Plan is in use
· This borrower belongs to a Loan Plan borrower category and already has Loan Plan transactions.
When a borrower has a Loan Plan type subscription, the corresponding counters are shown in the protected upper part of the details screen:

The counters are also shown when the buttons are not yet active.
431.7.3.1 Loan Plan history
After choosing the option an overview screen will pop up with a list of loans within the Loan Plan subscriptions:

This screen is for information purposes only.
431.7.3.2 Correct Loan Plan counter
After choosing the option a screen with the Loan Plan counters will be shown:
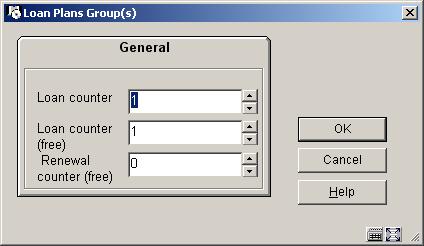
Here you can increase or decrease one or more counters. The value can not be less than 0. The value can not be higher than the maximum set in the parameters.
Examples:
When a borrower still has 10 loans to go and you set the Loan counter to 3, the remainder will now be 7. I.e. you have told the system 3 more loans have taken place than were counted.
When a borrower still has 10 loans to go and you set the Loan counter to 0, the remainder will now be the original maximum for the subscription. I.e. you have told the system no loans have taken place yet at all.
Note
The information in the counters in the protected upper part of the details screen is not refreshed after the adjusting the counters.